
How to Replace a Toilet Flapper (Updated March ’20)
Many times, when a toilet is unable to properly flush (or unable flush at all), its flapper is to blame. The flapper is the rubber stopper at the bottom of the tank which regulates the water flowing into your toilet. When the toilet’s handle is pressed, the flapper opens up and allows water to flow into the toilet. When something goes wrong with the flapper, the entire toilet may become downright unusable. However, not all hope is lost. With a bit of proper instruction, replacing your flapper can be a very easy and cheap process.
STEPS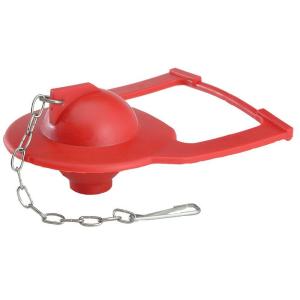
- Remove your toilet’s current flapper. Turn off your toilet’s water supply to make sure it doesn’t continually flush after the flapper has been removed. You may also choose to clog the hole underneath the flapper with something else if this proves to be easier for whatever reason, though this my prove to be less effective. Simply take the chain off of the flapper by slipping the end of the chain through the allotted hole on the flapper, then slip the flapper off of its fastening mechanism. The process is truly as simple as it sounds.
- Bring your flapper to the hardware store and find something which will be compatible with your toilet. If you’re having trouble deciding, show your flapper to a store associate who is equipped to deal with this sort of thing.
- With your new flapper in hand, simply slip it on the area where your last flapper was fastened. Each flapper will secure itself through a different means, but you’ll know how it fits simply by looking in the toilet. The flapper will typically just slip onto a mechanism which holds it in place.
- Attach the chain to your new flapper so that it fits the exact same way as it did on your old flapper. After this, you’re all done!
TIPS
After going through the above steps, your toilet will once again be working as good as new. However, it can’t hurt to take the appropriate steps to make the process as simple and as worry-free as possible. Keep some of the below tips in mind to ensure things run as smoothly as can be.
- Only plug your flapper’s hole when absolutely necessary. Without properly draining your toilet, installing your new flapper will be a much more difficult ordeal, although it certainly won’t prove impossible.
- If you’re unable to directly disconnect the flapper’s chain from the flapper itself, take the time to measure the chain in question and buy one of the same length at the hardware store. Just because your chain can’t slip off doesn’t mean you can’t fix your toilet.
- The other end of the chain connects to a “rod” of sorts. Check to see if the rod has multiple slots in which you may fit the chain. If so, you may be able to get away with chains up to an inch too short or too long. While it is best to buy a chain whose measurements are close to your current chain, don’t feel limited if such a chain is not available at the store.